 Contact
 Account
Sealing Wood Surfaces for Fall
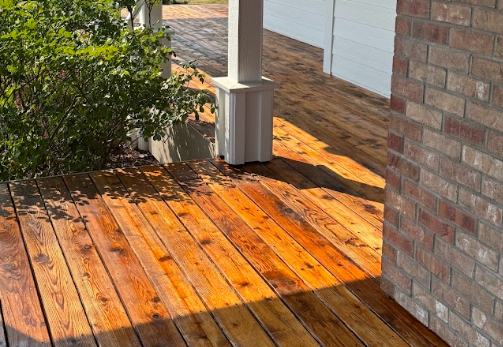
Why is fall a good time for sealing wood surfaces?
Fall often gives homeowners the sweet spot for exterior wood care: cooler temperatures than summer, less intense sun, and enough dry weather windows to complete the job properly. Many exterior stain and sealer manufacturers recommend applying products within a moderate temperature range, commonly around 50°F to 90°F, and planning for dry weather before and after application. Those conditions help the product penetrate or bond evenly instead of flashing off too fast, staying tacky too long, or trapping moisture under the finish.
This timing matters because wood is constantly responding to its environment. When rain, snow, and freeze-thaw cycles hit unprotected boards, moisture can move into end grain, cracks, fastener holes, and worn areas. A well-timed fall sealing project gives outdoor wood a better chance to shed water rather than soak it up.
Fall is also convenient. Decks and patios usually get less heavy use than they do in summer, gardens are winding down, and fences or exterior wood structures are easier to inspect after a full season of sun exposure. If you catch worn spots now, you can address them before they become bigger spring repair projects. Sealing wood surfaces for fall doesn’t have to be difficult. Here is our simple guide.
The goal is moisture control, not magic
A good sealer does not make wood indestructible. It slows water absorption, helps protect the surface from weathering, and supports a longer maintenance cycle when paired with smart upkeep. Think of it as part of a wood preservation system, not a one-time fix.
The best results come from matching the product to the job. A horizontal deck board faces foot traffic, standing water, furniture abrasion, and direct sun. A vertical fence sheds water more easily but may take more UV exposure and wind-driven rain. A cedar shake, railing, planter, or pergola may need a different balance of penetration, appearance, and durability.
That is why wood preservation methods should be chosen around exposure, wood type, current condition, and the look you want to keep. Clear and natural finishes highlight grain but may need closer maintenance. Tinted products can add UV protection and color consistency. Film-forming finishes can create a harder surface, but on weather-exposed wood they may peel if moisture gets underneath or if preparation is poor.
Choosing the right outdoor wood sealer
Most exterior wood sealers fall into a few broad categories. Each can work well when used in the right setting, but they behave differently once the weather turns.
Penetrating oils
Penetrating oil sealers soak into the wood fibers rather than building a thick surface film. They are often chosen when the goal is to preserve a natural look, reduce water absorption, and avoid a coating that may visibly peel as it ages. They can be especially appealing for fences, decks, cedar, wood shingles, log-style surfaces, and garden structures where the grain is part of the appeal.
Presidential Shingle Oil is one example to consider for fall projects. It is used as an outdoor wood sealer and is promoted for exterior wood surfaces including decks, fences, cedar shake roofs, log homes, and garden structures. For homeowners preparing before autumn weather, applying Presidential Shingle Oil to fences, decks, and similar outdoor wood surfaces can be part of a practical seasonal sealing plan.
Stain-and-sealer combinations
Stain-and-sealer products add color while helping protect the wood from moisture. They are useful when boards have uneven tones, mild graying, or a color you want to refresh. Semi-transparent options let more grain show through, while more opaque finishes create a stronger color statement.
These products are common on decks and fences because they combine appearance and protection in one project. The tradeoff is that future maintenance may involve color matching, cleaning, and sometimes stripping if the old finish becomes uneven.
Film-forming finishes
Polyurethane, varnish, lacquer, and similar synthetic finishes create a surface layer. They can be effective in controlled environments or on certain protected exterior features, but they are not always the easiest choice for large, weather-exposed surfaces. If the coating cracks, moisture can enter and create peeling or cloudy spots.
For outdoor decks and fences, many homeowners prefer penetrating or stain-and-sealer options because maintenance can be more forgiving. Still, always follow the specific label for the product you choose, especially around surface preparation, number of coats, drying time, and weather limits.
How should you prepare wood before sealing?
Preparation determines whether a sealer performs as intended. The surface should be clean, dry, sound, and able to absorb the product. If dirt, mildew, old loose finish, or excess moisture is present, the sealer may sit on top, cure unevenly, or fail earlier than expected.
Use this pre-sealing checklist before opening the can:
- Inspect the wood. Look for soft spots, rot, popped fasteners, splinters, cracked boards, and areas where water sits.
- Clean thoroughly. Remove leaves, pollen, grease, algae, mildew, and old debris from gaps between deck boards or fence rails.
- Use pressure carefully. Pressure washing can help on decks and fences, but too much pressure can scar softwood or raise fibers.
- Let the wood dry. After rain or washing, allow enough drying time. Some guidance recommends multiple dry days before staining or sealing, depending on weather and product requirements.
- Check absorbency. Sprinkle a few drops of water on the surface. If water beads and sits there, the wood may not be ready to accept a penetrating finish.
- Sand rough areas. Light sanding removes raised grain, splinters, and weathered fibers that can interfere with an even finish.
- Protect surroundings. Cover plants, siding, concrete, metal hardware, and nearby surfaces that could be stained by drips or overspray.
A practical fall sealing process
Once the surface is clean and dry, work methodically. Rushing usually shows later in lap marks, shiny patches, sticky areas, or missed end grain.
- Read the product directions first. Confirm the recommended temperature range, dry time, coat count, tools, cleanup method, and any restrictions for your wood type.
- Test in a small area. Choose an inconspicuous board to check color, absorption, and sheen after drying.
- Start with edges and end grain. End grain absorbs moisture quickly, so cut ends, board ends, post tops, and cracks deserve careful attention.
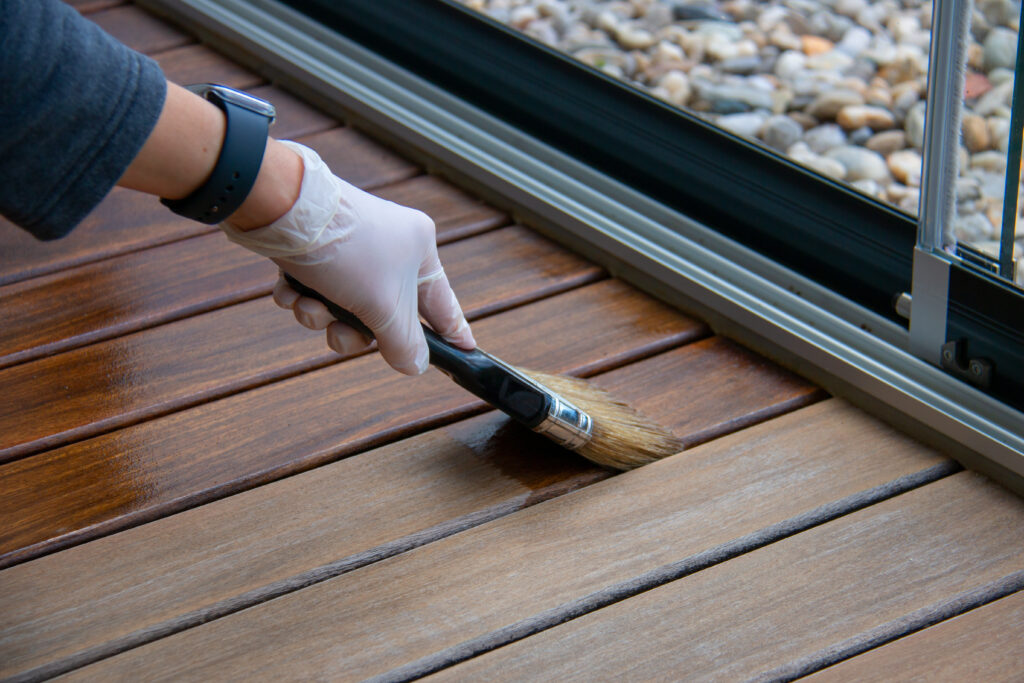
- Apply thin, even coats. More product is not always better. Heavy application can leave tacky residue or uneven curing.
- Work with the grain. Use a brush, pad, roller, or sprayer as allowed by the product, then back-brush when needed to help penetration and even coverage.
- Maintain a wet edge. On decks and fences, work board by board or section by section to avoid lap marks.
- Respect drying and recoat times. Cooler fall air and lower sun angles can extend drying, especially in shaded areas.
- Keep traffic off the surface. Wait until the finish has cured enough before replacing furniture, rugs, planters, grills, or décor.
For decks, avoid sealing in direct midday sun if the surface is hot. For fences, watch the wind so overspray or drips do not land on vehicles, plants, or neighboring property. For outdoor furniture, elevate pieces so you can reach legs, undersides, and end grain.
Small choices that make a big difference
The difference between an average sealing job and a durable one often comes down to details. These are easy to miss, but they matter.
- Do not seal over wet wood. Trapped moisture can contribute to poor penetration, cloudy finishes, mildew, or peeling.
- Do not ignore shaded areas. North-facing boards, lower fence rails, and deck areas under planters may stay damp longer.
- Do not forget gaps and joints. Water collects where boards meet, around posts, and near fasteners.
- Do not apply right before rain. Even if the surface feels dry to the touch, the product may need more curing time.
- Do not mix incompatible finishes. If an old coating remains, confirm whether your new sealer can go over it or whether stripping is needed.
If your deck or fence has a failing film finish, preparation may take longer than the sealing itself. Removing loose coating and getting back to a sound surface is not glamorous, but it prevents the new finish from inheriting the old finish’s problems.
Seasonal maintenance keeps the seal working
After sealing, maintenance is simple but important. Sweep leaves off decks so tannins and moisture do not sit on the boards. Move planters occasionally, use feet or risers under pots, and avoid outdoor rugs that trap dampness for long periods. Keep soil, mulch, and vegetation away from fence bottoms and wood posts where possible.
Through winter, remove heavy snow with a plastic shovel or broom rather than a sharp metal edge that can scrape the finish. In spring, rinse away grime and inspect high-wear areas such as stairs, handrails, gate edges, and sunny deck boards. If water no longer beads or the surface looks dry and washed out, plan a maintenance coat according to the product’s guidance.
A fall sealing routine is not just about appearance. It is about reducing avoidable moisture stress before the hardest season for exterior wood.
The takeaway for fall wood protection
Sealing wood surfaces before autumn weather is a smart, manageable project when you choose the right sealer, prepare carefully, and work within a dry weather window. Focus on clean, dry, absorbent wood; use a product suited to your deck, fence, or outdoor structure; and give the finish time to cure before rain and colder weather settle in.
For homeowners looking for an outdoor wood sealer for fences, decks, and similar exterior surfaces, Presidential Shingle Oil is a practical product to consider as part of a fall wood preservation plan. Pair the right waterproof wood seal with steady seasonal maintenance, and your exterior wood will be better prepared for the months ahead.